Development services play an important part in our daily work as a solution provider. For our customer-specific projects, we often cannot find the right housings, even there is a large number of ready-made housings on the market. Therefore, we have decided, especially for the prototype phase, to produce the housings by ourselves using a 3D printer.
In the first part of our new blog series “We are now printing three-dimensionally”, we described which criteria were important for the selection of a suitable 3D printer.
Now we eagerly awaited our new hardworking “employee”.
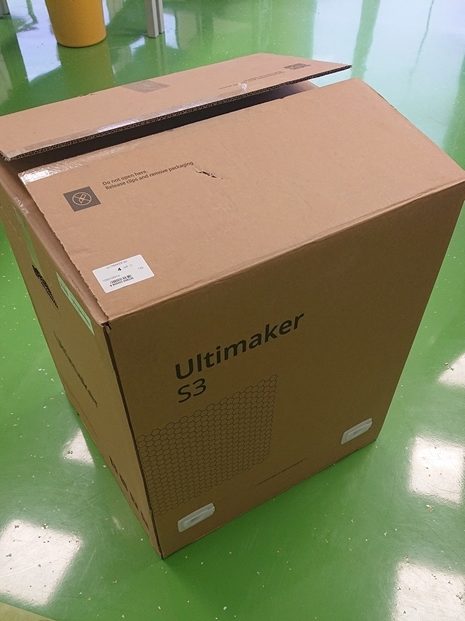
The package has arrived.
The welcome of the postman was not as much as in the advertisement. No screaming in the staircase. But we were still excited.
So now, it is here. Our new 3D printer. But where should it be placed?
Generally, we see the 3D printer more in our development department than in the serial production. Therefore, we decided against setting up the machine in the production area, where it might belong more. Instead, it is placed in a developer’s office that is currently not used. The advantage is that the network cabling is already prepared and no workplaces have to be changed. No sooner said than done.
Now it is time to unpack.
The tension increases, we open the package.
Even though it is made of cardboard, the packaging is not. The responsible people at Ultimaker have thought carefully about this.
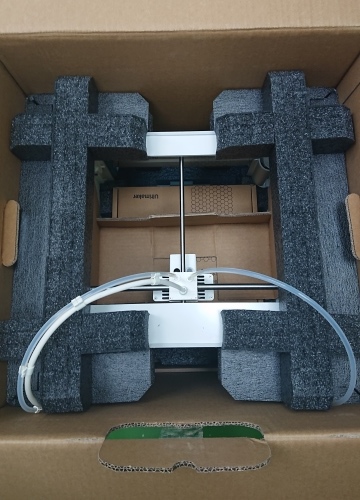
The printer is packed very properly and sturdily. The padding protects against the uncertainties of shipping. Especially brilliant are the clips on the side that hold the top and bottom of the package together.

In this way, you can disassemble the packaging and uncover the printer in four easy steps.

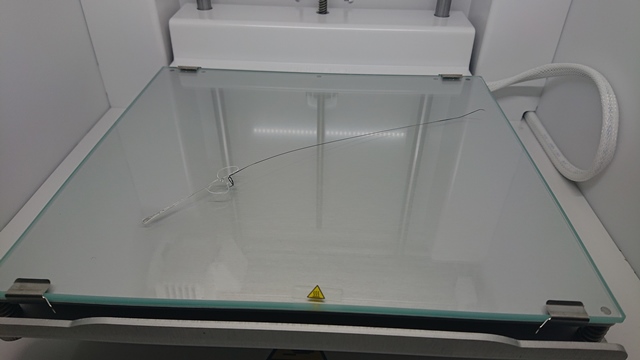
The padding foam and the remaining protective elements are quickly removed and the printer is immediately placed on the table. That was quick and easy. Almost everything is already assembled. Following the quickstart guide, we mount the coil holder and the glass plate.
Then we simply connect the electricity cable and network cable and … switch on.
Here we go.
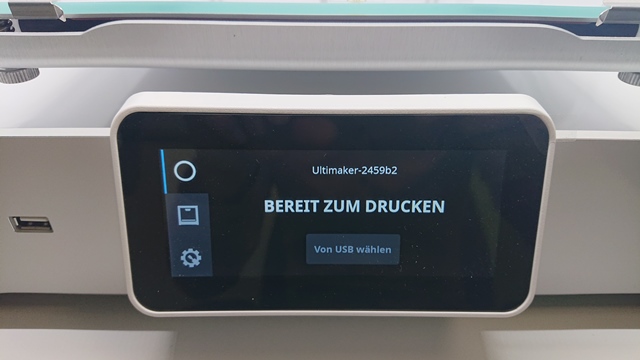
After switching on, the interior of the Ultimaker S3 is brightly illuminated and the display shows some information.

Now, we follow basically the instructions on the display:
- Select language
- Confirm glass plate
- Insert pressure nozzle (Hui, it moves!)
- Insert material (RFID actually works!)
- And also wait for a moment.
That’s it. And we also have the first 3D print, which is generated during material insertion.
From now on, we will print… But more about the first printing attempt in the next part.

